DIY sandbox: step-by-step instructions and original ideas
When children appear in the family, it is very important to properly organize their leisure time and make it as safe as possible. Owners of a private house are especially lucky, as you can equip a sandbox, which will be a great play area for children. Today, there are many different options, ranging from multi-level to simple plastic structures. In any case, not only appearance and design are important, but also convenience, safety. Therefore, we suggest trying to make a sandbox with your own hands.


Do-it-yourself sandbox with a lid: a step-by-step workshop
As mentioned above, in the modern world there is a wide variety of sandboxes. Among the most popular are plastic structures, for the creation of which linear polyethylene is used. Due to this, they are safe and you can be sure that the child will definitely not receive any splinter. The undeniable advantage of such a sandbox is ease of maintenance. It does not need to be painted every year, in addition, it can be washed quite easily and cleaned until the next season. Even if the structure is in the sun, this does not mean that it will heat up.


It should be noted that the sandbox made of plastic has a rather high cost. This is not surprising, especially considering the number of significant advantages. But at the same time, if it is necessary for a short period of time, then it is worth taking a closer look at other, more budget options.

Perhaps the ideal solution would be to create a wooden sandbox with your own hands. Of course, this will take a lot of time, but the result is really worth it. We recommend starting with the choice of the place that is suitable for the installation of the structure. Keep in mind that the sandbox should be visible from a variety of places in the territory, as well as from home. This is necessary so that the child is always in the field of view of the parents. In turn, experts advise not to put it under the trees, since the leaves will pollute the territory. The best option is a flat and open space.


After that, you need to calculate the dimensions of the future sandbox, and also choose the appropriate shape. Basically, it depends on the size of the free territory, the age and number of children for whom the structure is made.

The work will need such materials:
- boards;
- shovel;
- rope;
- pegs;
- roulette;
- grinder;
- paint;
- hacksaw;
- sand;
- tamper;
- timber;
- liquid bitumen;
- antiseptic impregnation;
- self-tapping screws;
- jigsaw;
- bolts with nuts;
- long loops;
- drill;
- primer.

To begin, proceed to the preparation of the site. We remove excess stones and clean the area from branches, various weeds and various debris. After that, we proceed to the preparation of wooden elements. We process each of them with a grinding machine or sandpaper.

The beam that is needed for installation is sawn into pieces of the same size, grinded and treated with antiseptic impregnation, as well as liquid bitumen. We collect the blanks among themselves.


The result is an impressive construction size. It’s best to continue working with her in the fresh air.

For greater reliability, we strengthen the corners of the structure with the remnants of the beam.
 We put the first coat of paint on a wooden blank and leave it to dry completely.
To prevent the sandbox from becoming dirty, it is best to make a special cover. To do this, we trim the boards along the width of the sandbox itself and process the entire surface with sandpaper or a grinding machine. Apply a primer and leave the blanks to dry. Then we paint with paint in two layers. We cover the hinges with the same shade of paint, so that after the rain there are no signs of corrosion.

In this case, the lid will not be simple, but with the ability to turn it into a shop. Therefore, it is very important to correctly assemble every detail. To prevent mistakes, follow the step by step instructions in the photo.


Please note that the bars are attached so that, when opening the lid, they abut against the wall of the sandbox. Due to this, they will be a kind of support for the back of the bench.


When unfolded, the sandbox will look like in the photo.

If desired, the second side can be done without a back. Thanks to this, attaching it will be much easier.


The result is a fairly solid bench on which adults can sit. 
Using a shovel, we dig a pit, according to the size of the sandbox. We lower the supporting legs so that the walls lie slightly on the lawn.


The structure is installed and it's time to fill it with sand. If necessary, sift it. This will help get rid of excess debris, cobblestones. Also, due to this, the sand will be more soft. For children, this is very important, since it will be a pleasure to play with it.

The result is a wonderful functional sandbox that will definitely appeal not only to children, but also to their parents.

DIY sandbox: ideas on the photo
The most practical option for the sandbox can rightly be called a design with a lid. Thanks to this element, you can protect the sand from rain, wind and excess debris. And this, you see, is a significant advantage.


If desired, a removable awning can be used instead of a cover. Of course, it is less reliable, but at the same time it is much better than leaving the sandbox without it in rainy weather.


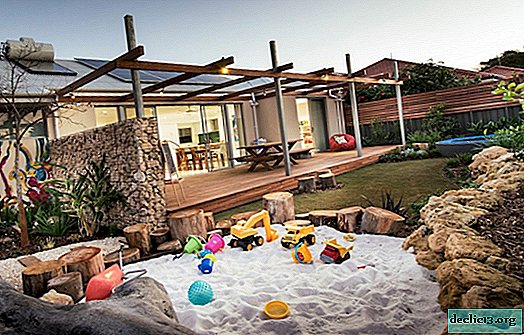
If you don’t have the desire or opportunity to buy expensive materials, then remember that the sandbox can even be made from improvised materials. It can be various logs, pallets and even tires. Such designs look very original. But the main thing is to take into account some nuances. Remember that materials should not have sharp corners. Also make sure that they are strong enough and safe for children.


 Creating a sandbox with your own hands is a rather complicated task. Therefore, be inspired by ideas, study information, view master classes and then everything will work out.


